Unless you live under a rock, odds are you have a lot on your plate. Even if you’ve tried to keep things simple, there’s always something that needs to get done. Luckily, there are free tools available to help us stay organized and productive. If the tool is user-friendly & has all the basics covered, we’re in! So here’s a breakdown of how to use ClickUp (free version) to stay sane:
Basic Structure:
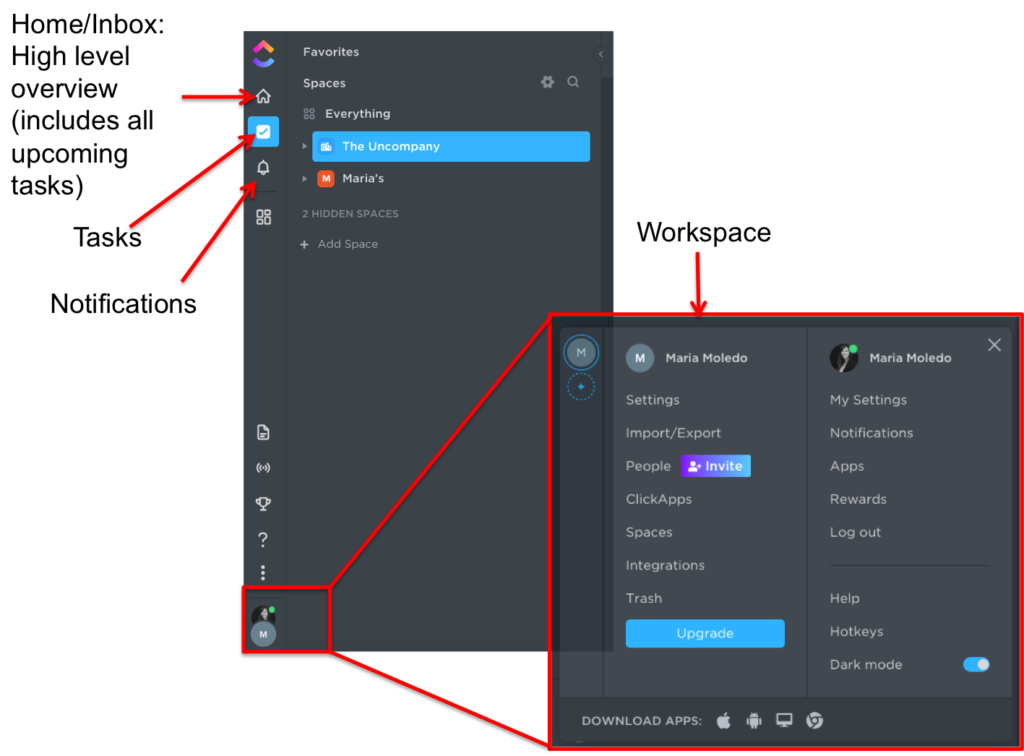
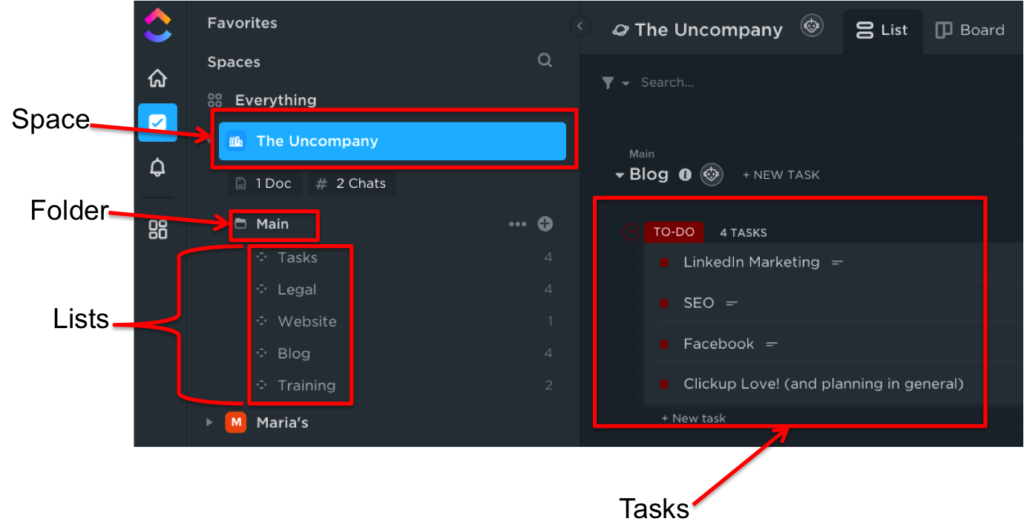
- In ClickUp you’ll have your workspace, which is basically your account. In your Workspace you can have Spaces, and each Space can have folders, lists, tasks, and sub-tasks. However, you don’t need to have folders within a Space, you can simply have lists & tasks.
- As you create Spaces, you’ll notice that if you select ‘Everything’ it will show every list & task under all of your Spaces. (This is a really great feature) But you can also choose specific Spaces, folders, or lists, depending on the tasks you wish to see.
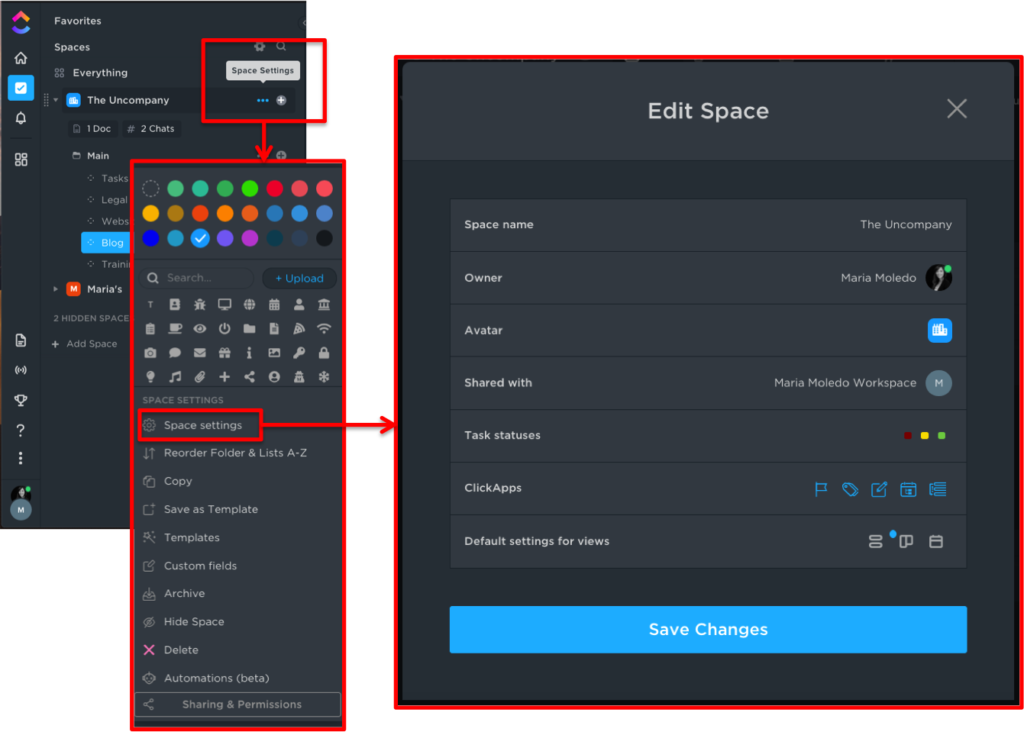
Space Settings
- Status – You can select which task statuses you need. ClickUp has templates you can select from or you could customize them. I usually keep it simple and use ‘To-Do’, ‘In-Progress’, and ‘Complete’. You can also select a color for each status. As you create folders and lists, you can apply the same statuses specified for the Space, or customize them as needed.
- ClickApps – Here you can select ClickApps for your tasks. Examples are Tags, Time Tracking, Multiple Assignee(s), Priority, etc.
- Sharing – You can select whether a Space is Private (locked) or shared with a team member and/or a guest.
- Views – ClickUp has a variety of views to choose from. You can select them when a Space is created, and you can tailor them later, per level. Some common views, especially for people who have used Trello & Asana, are the board and list views. There’s a bunch to choose from though, like Calendar, Gantt, and a mind map of tasks or free-form to explore ideas and create additional tasks. As you move through the structure, you’ll be able to switch between views.
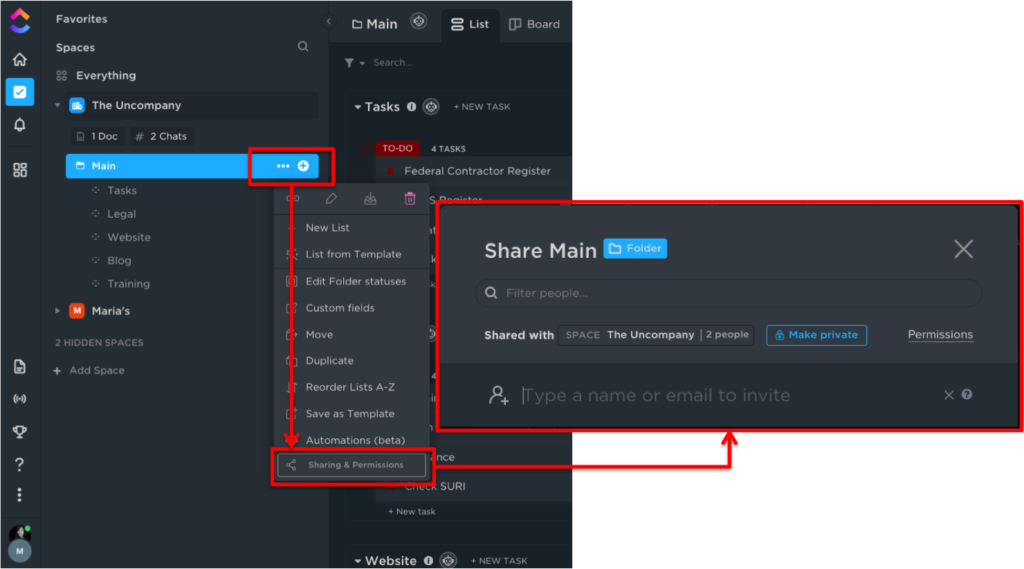
Adding team members
- As you work, you’ll probably want to share some of your Spaces/Folders/Lists/Tasks. At any level, you can select sharing & permissions and add either team members or guests. With ClickUp’s free version, adding a team member or a guest will mean they have full access. With the paid version, you’ll be able to edit permissions for each member/guest.
Communicating with Team
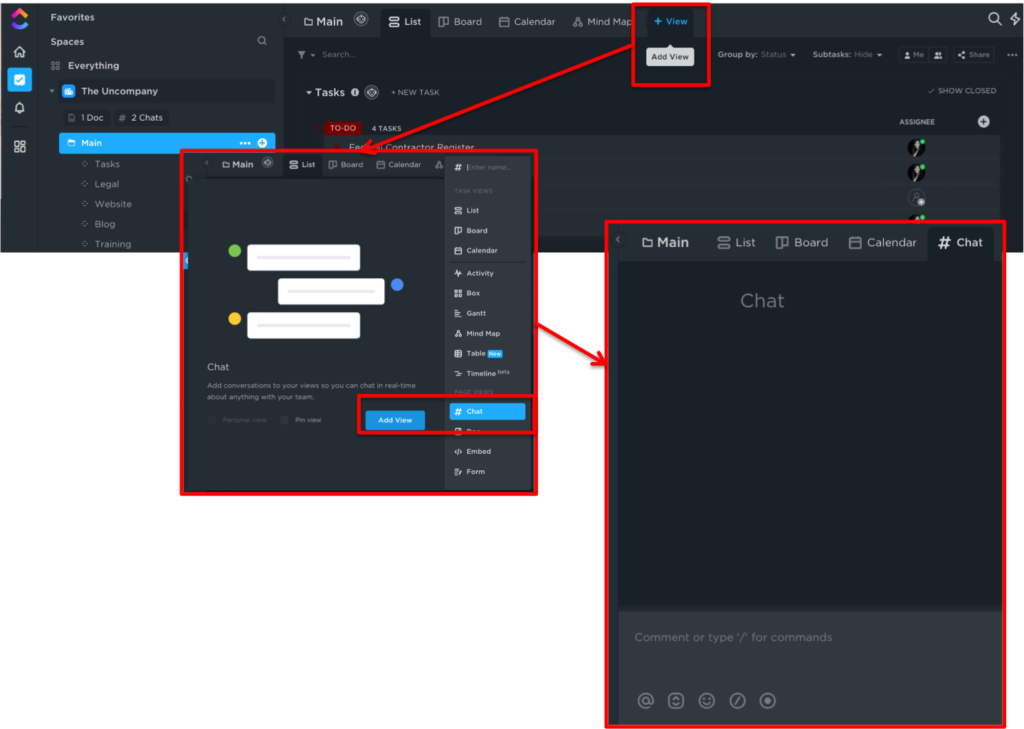
- One of the view options you can add is the chat. Once added, you’ll be able to communicate with your team regarding a task. The ‘@’ can be used to mention them in a comment or share files.
Tailoring Tasks
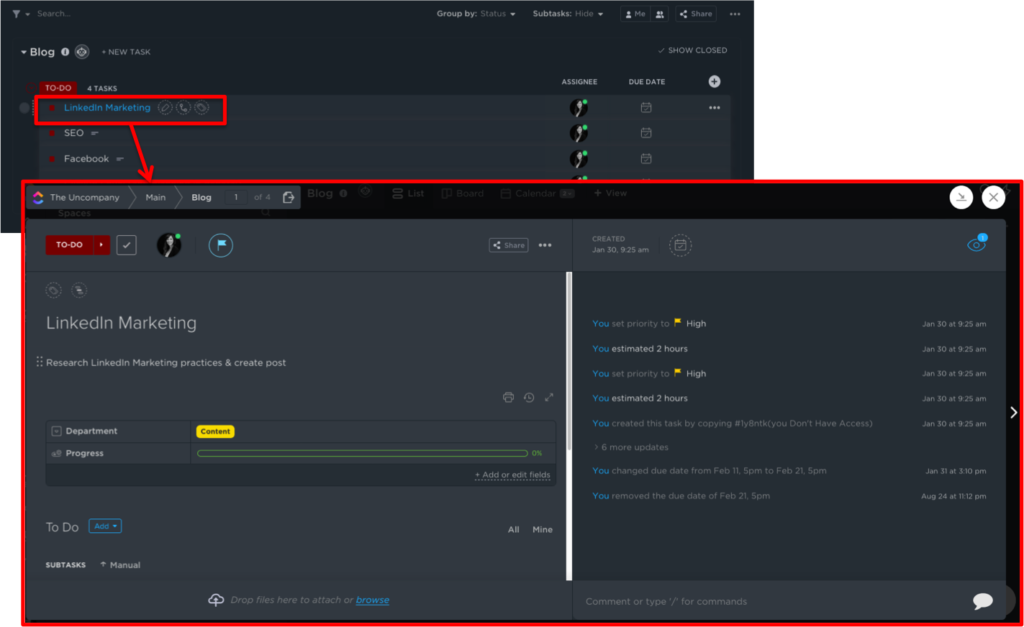
- Once you create a task, you can edit its name, add an assignee, add a start/due date, add recurrences, files, comments, checklists, and sub-tasks.
Notifications
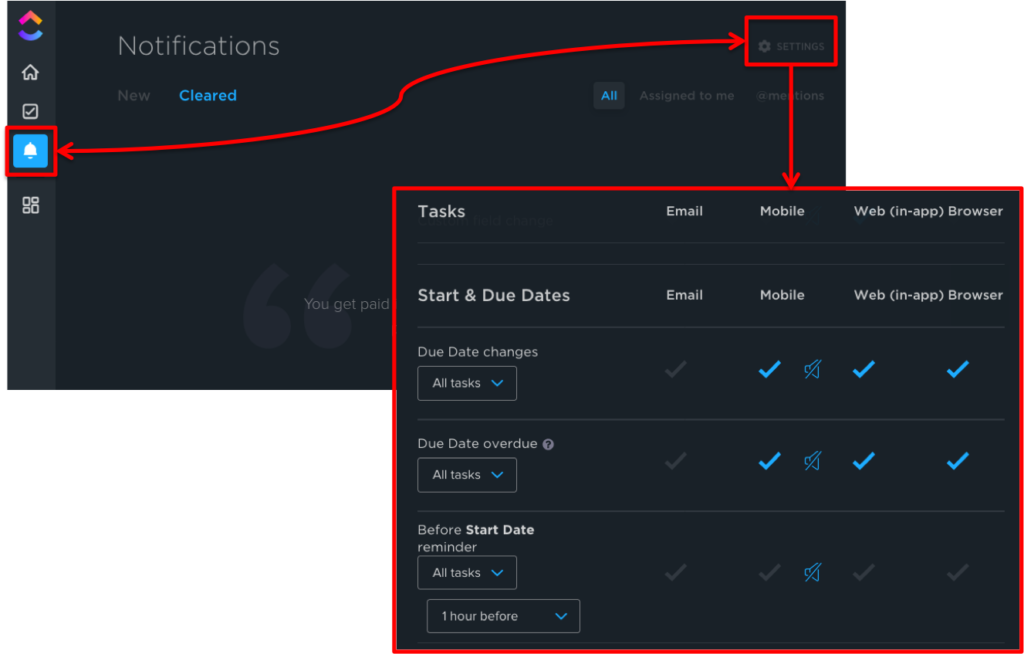
- If you don’t want to receive a bunch of notifications via email or at your mobile, take a few minutes to tailor these. There are quite a few options, but if you want to keep it simple, there’s quite a few that can be toggled off.
Of course, there’s much more you can do and customize within the tool. But you can start with the basics, and add/explore functions as you go. If you have any questions or comments, please let me know! Do you have a different tool that you prefer? Why?
If you’d like to know more about how we can help support ongoing tasks or projects, please visit our services page and contact us with any questions you might have.

